I'm back! Been focusing on my podcast for young 'uns - Podaroo - in my spare time. You can dowload it from iTunes here. But I'm back to blog. My twins are about to start preschool this fall, so I have a feeling there will be a bunch more kid, budget, and ecoLiving revelations on the school front to come.
So I've been hearing about lead in kids drinks and wanted to look up the brands for myself. The PDF with the list is linked to in this Seventh Generation post. I'm assuming they're talking about big bottles of juice, not juice boxes but I couldn't figure that out for sure. Interesting question in all this about WHERE the lead is coming from... manufacturing? the apple growers?
I also happened to get into a discussion last night with our scientist neighbor about BPA in canned tomatoes. So I gave subject another google this AM and here is the result. If you are looking to avoid canned tomatoes since the acidic food seems more prone than others to leach the BPA out of the resin liner, Berkeley Bowl currently has organic diced tomatoes in 25.5 oz. GLASS JARS on special for $2.99. No bargain but given they're organic and packed in glass I may stock up - in the winter we do LOADS of cooking with canned tomatoes.
Showing posts with label health-wise. Show all posts
Showing posts with label health-wise. Show all posts
Thursday, July 8, 2010
Wednesday, August 19, 2009
Making foaming hand soap refills for toddlers
 I'm a big fan of using foamy soap for teaching my girls to wash on their own. Because the product is basically diluted soap, it wastes less if they go overboard and also it washes off more easily. With H1N1 season coming I imagine we'll be doing lots of handwashing.
On that note, I've been researching the best way to make a refill. Just adding regular liquid soap to the pump clogs the mechanism. One website I found said to dilute liquid soap with boiling water (I could see how this would dissolve the soap without creating bubbles as happens with shaking). Others suggested a variety of ratios of liquid soap to water. One place suggested 1 oz. Dr. Bronner's to 5 oz. water -- Dr. Bronner's is already so liquidy it's easy to work with.
I ended up going 1 tablespoon standard liquid soap to 3/4 cup water. I combined them in the soap dispenser and shook them up. So far so good. That's a 10:1 water-soap ratio which I read was best for not clogging the soap bottle.
Besides being a cheaper way to go than buying the pre-made foaming soap refills, making your own foaming soap can ensure eliminating an ingredient commonly used to make the soap foamier: SLS. (Sodium Lauryl Sulfate). While I am not super hard core about trying to avoid SLS, it's not something you really want to have in EXTRA doses. There are some pre-made foamy soap refills that don't have it like this Kiss My Face version.
Part of me was also excited about making my own foaming soap because I thought I could make an unscented version. I know scent free is supposed to be best for sensitive skin. But when it comes to my toddlers who are adamant about independence when hand washing I like something with a strong fragrance so I can tell easily if they've washed or not. I ended up used the last of this lemongrass soap I had on hand.
Sunday, March 1, 2009
Coupons for healthy and organic foods and products
It's actually a well set up site... you select the coupons you want and type in your email. The coupons land in your in box and you print them out.
So I was suddenly on the prowl. And found these totally useful coupon sites next:
- Coupons for Seventh Generation diapers and other Seventh Generation products
- Coupons for Organic Valley dairy products
- And this site Mambo Sprouts, that currently has some good coupons up for products including BioKleen and Method cleaners, and Maranatha Nut Butter and more. You can also sign up there to get coupons in the mail.
Thursday, September 11, 2008
GoodGuide.com: useful new site
Here's a link to story I was assigned this week. It's about a useful new site that just launched. You can look up consumer products and get immediate scores back on health, environment and social performance. If you want to drill down and get more info you can.
It just launched with personal care and household cleaning products. Up next: Food, electronics and toy ratings. And of course, an iPhone app.
It just launched with personal care and household cleaning products. Up next: Food, electronics and toy ratings. And of course, an iPhone app.
Wednesday, July 16, 2008
Wholesome mac 'n' cheese with veggies for your toddler
This still has cheese and milk and a little butter, but it is also made with whole wheat pasta and chock full of veggies. An easy all in one meal that your toddler and the big people in the house will down with gusto. It's also a great easy to reheat casserole to bring to a new mom as a "sunshine meal" (that's why I'm making the mac 'n' cheese pictured below in a disposable pan).
I've taken an old recipe my mom used for us growing up and made it about as quick and easy as a dinner dish could be (caveat: assuming you have a food processor).
Here's what you need...
EASY WHOLE WHEAT MAC AND CHEESE WITH VEGGIES
8 oz. whole wheat pasta (penne, spirals, easy ones like these for tots to hold are good)
1 sweet bell pepper
2 medium green zuchinni
2 medium carrots
(or the equivalent of the above in fresh, seasonal veggies - about 4 cups shredded, packed)
8 oz. cheddar cheese, cubed
2 tablespoons butter
2 tablespoons flour
1/2 teaspoon salt
dash of pepper (if you want)
2 cups hot milk (I use a glass 2 cup measure to heat the milk in the microwave)
1/2 cup whole wheat bread crumbs (I make them whenever I have bread around that's getting a little stale and keep them in the freezer)
Preheat the oven to 350 F
Start out by putting water on to boil to make the pasta. Next wash the veggies and put them through a grater blade in the food processor.
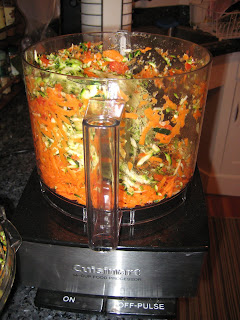
Once the vegetables are grated in the food processor, transfer them to another bowl and put in the metal blending blade. Now it's time to make the "sauce." Check the water pot on the stove and ideally it's boiling so you can start cooking the pasta now according to the directions on the package. Once the pasta is in the pot, I set a timer for 3 minutes LESS than it will take the pasta to cook thoroughly. When the timer rings I throw in the grated veggies to just cook briefly.
Put the milk in the microwave to heat. While that's going on, with the metal blending blade in place put the cheese cubes, flour, butter, salt, and pepper in the processor bowl. Once the milk is almost boiling, cover and turn on the processor and start pouring the milk slowly (and carefully) in through the feeding tube. The cheese will melt as the milk pours in and if you let it run for about 40 seconds it will turn into a nice cheese sauce.

Hopefully the timer has rung and you've added the veggies. After a few minutes when the pasta and veggies are ready, you can strain it. Now put the pasta and veggies in a casserole dish. I believe I use a 2 quart. Cover the pasta with the cheese sauce and stir to mix. Cover this with the bread crumbs. Put the pan in the oven. Bake for 30 minutes. It's done when it's bubbling. YUM.
I'm actually curious how this stacks up cost-wise to store bought organic mac n cheese and veggies so I'm going to try to do that ounce for ounce cost comparison in the next week and will post.
I've taken an old recipe my mom used for us growing up and made it about as quick and easy as a dinner dish could be (caveat: assuming you have a food processor).
Here's what you need...
EASY WHOLE WHEAT MAC AND CHEESE WITH VEGGIES
8 oz. whole wheat pasta (penne, spirals, easy ones like these for tots to hold are good)
1 sweet bell pepper
2 medium green zuchinni
2 medium carrots
(or the equivalent of the above in fresh, seasonal veggies - about 4 cups shredded, packed)
8 oz. cheddar cheese, cubed
2 tablespoons butter
2 tablespoons flour
1/2 teaspoon salt
dash of pepper (if you want)
2 cups hot milk (I use a glass 2 cup measure to heat the milk in the microwave)
1/2 cup whole wheat bread crumbs (I make them whenever I have bread around that's getting a little stale and keep them in the freezer)
Preheat the oven to 350 F
Start out by putting water on to boil to make the pasta. Next wash the veggies and put them through a grater blade in the food processor.

Once the vegetables are grated in the food processor, transfer them to another bowl and put in the metal blending blade. Now it's time to make the "sauce." Check the water pot on the stove and ideally it's boiling so you can start cooking the pasta now according to the directions on the package. Once the pasta is in the pot, I set a timer for 3 minutes LESS than it will take the pasta to cook thoroughly. When the timer rings I throw in the grated veggies to just cook briefly.
Put the milk in the microwave to heat. While that's going on, with the metal blending blade in place put the cheese cubes, flour, butter, salt, and pepper in the processor bowl.
 Once the milk is almost boiling, cover and turn on the processor and start pouring the milk slowly (and carefully) in through the feeding tube. The cheese will melt as the milk pours in and if you let it run for about 40 seconds it will turn into a nice cheese sauce.
Hopefully the timer has rung and you've added the veggies. After a few minutes when the pasta and veggies are ready, you can strain it. Now put the pasta and veggies in a casserole dish. I believe I use a 2 quart. Cover the pasta with the cheese sauce and stir to mix. Cover this with the bread crumbs. Put the pan in the oven. Bake for 30 minutes. It's done when it's bubbling. YUM.

I'm actually curious how this stacks up cost-wise to store bought organic mac n cheese and veggies so I'm going to try to do that ounce for ounce cost comparison in the next week and will post.
Tuesday, April 29, 2008
Getting a funny odor/smell out of SIGG bottles...
 ... or probably any metal water bottle for that matter.
I love our SIGG bottles, but occasionally if I leave my water bottle half full in a warm car it gets a funny moldy smell or taste. I've found using hot water and soap fades that. But then I went and left milk for the girls in a bottle and forgot about it. The sour milk smell just would not leave.
I tried the trusty water and vinegar approach. Filled the bottle up 1/8th of the way with white vinegar and then the rest of the way with water (same basic solution I use for cleaning off toys that need it). Closed the cap, shook it and let it stand almost a day. The terrible odor was gone when I rinsed the vinegar solution out. I'm sure it would work wonders on the plain old moldy issue.
In a way I wish it hadn't worked because I wanted to test out this other cure I'd heard about: denture cleaning tablets. It's supposed to be a cure all for SIGG bottle smell. My one reservation is that it's basically bleach in a fizzy matrix. Wasn't sure about how I felt about putting bleach into the girlio's water bottle. That caveat aside, you can sanitize the bottles for far less cost by just using a teaspoon of bleach in a liter of water (can add 1 tsp. baking soda too). The whole denture cleaning tablet trick is what some people use to clean out those Camelbak water hydration systems.
Oh, and apparently the risks of bacterial and fungal growth are higher if you use the bottle with a drink that contains sugars. So make sure the wash out the bottles immediately and well after putting juice or other sugary drinks in them.
Hope that's helpful... (though I'm running the risk of turning this into a blog of all things smelly).
Monday, February 25, 2008
Waffles, baby!
 Waffles are a terrific fast food for kids: if you can load them with fruits and/or veggies - and also milk and yogurt - you're covering lots of nutritional bases. Plus you can freeze leftovers and just pop them in the toaster when you want them warmed up. EASY!
Here are three recipes I've adapted for our kids. Because there is canola oil instead of butter they don't have the usual crispiness of waffles, but we don't mind. Also they have less sugar than usual with the idea that we adults can pour a little syrup on to sweeten them up. Finally, they are made on a waffle iron like the one pictured at left. Enjoy!
Kabocha Squash Spice Waffles
Makes almost 3 large (12 small) square waffles
2/3 cup smashed, roasted Kabocha Squash (I’m sure other squash would be fine, too, I just like Kabocha for it’s rich flavor)
½ cup plain full-fat yogurt
½ cup milk
2 eggs
2 tablespoons canola oil
1 teaspoon vanilla
2 tablespoons brown sugar
¾ cups plus 2 tablespoons white whole wheat flour
1 teaspoon baking powder
¼ teaspoon baking soda
¼ teaspoon salt
½ teaspoon cinnamon
¼ teaspoon ground nutmeg
Preheat the waffle iron.
In a large bowl combine well the squash, yogurt, milk, eggs, oil, vanilla and brown sugar. Stir in the baking powder, baking soda, salt, cinnamon, and nutmeg. Add flour and stir just until combined.
Pour onto a waffle iron coated with non-stick spray. Follow the manufacturer’s directions for baking.
Carrot-Whole Wheat-Raisin Waffles
Makes 3 big waffles (12 little squares)
1 cup milk
2 eggs
2 tablespoons canola oil
¼ cup raisins
2 tablespoons sugar
¾ cup white whole wheat flour
¼ teaspoon salt
½ teaspoon cinnamon
¼ teaspoon ground nutmeg
¼ cup quick oatmeal
½ cup + packed fine grated carrots (about 2 medium carrots)
Whisk together milk, eggs, oil and raisins and set aside 15 minutes to plump.
Preheat the waffle iron.
While raisins are plumping combine flour, sugar, baking powder, salt, cinnamon and nutmeg. Mix with a fork. Gently stir in oats and carrots.
Pour onto the waffle iron and follow the manufacturer’s instructions for baking.
Oatmeal-Buttermilk-Blueberry Waffles
Makes 16 little square waffles
2 cups quick oatmeal
2 cups buttermilk
Combine in a bowl and let stand to soften, about 10 minutes – less if in a real hurry. Softer it is, the tastier it is. Even overnight is fine.
Add in and stir:
3 eggs
2 tablespoons sugar
4 tablespoons canola oil
dash of vanilla
Stir in:
1 teaspoon baking powder
1 teaspoon baking soda
1 teaspoon salt or less
Once that’s combined add:
½ cup white whole wheat flour
1-1/2 cups frozen organic wild blueberries (I bet you could substitute 1-1/2 cups of almost any other fruit or veggie, like raisins or finely shredded zucchini, etc)
Spray a light coat of oil or Pam on a preheated waffle iron. Put a heaping cup of batter on the iron and bake as directed. You end up with 4 big waffles, 16 little squares. Enjoy!
Tuesday, February 12, 2008
Beware Pottery Barn (and PB Kids) rugs - they can smell like burnt rubber
 UPDATE: sign a petition directed at Pottery Barn here
It all started when we were give some credit and coupons for Pottery Barn. We thought we would get two rugs to cushion the wood floor in the girls' room. This was before the girls were born. Within a few months there was the most noxious burning rubber smell in their room. I traced it to the back of the rug and it totally correlated with heat. As we got into summer it got so unbearable we took it out and I went back to the store and demanded a refund. From what I've now found here, here and here, I was lucky. Apparently it's a common problem. A lot of people didn't get their money back or got way reduced values. We put the smaller rug that didn't seem to be a problem in our office, but just last week I noticed that started with the smell. Argh.
The most credible answer I could find for the smell was posted at RedBook Magazine by someone calling himself Rug Guy:
This odor is commonly found in rugs that are hand-tufted in India. These rugs are quite substantial for their low cost, but we've found that about one in ten either has this odor from new or will develop the odor in a year or two. The problem is with impurities in the latex rubber that holds the tufts of fiber in place. Remove the latex and you remove the smell, but remove the latex and the rug may fall apart. There is no economical way to fix this as the time and effort involved in removing the rug backing, scraping off as much smelly adhesive as possible, and recoating with a quality latex will cost near the replacement value of the rug and may not remove the smell completely. The only sure cure is to return the rug to the retailer. Again, we see this in one in ten, so if you really like the rug you may be able to trade it for one that doesn't smell.
If you do buy a Pottery Barn rug for your kid make sure you smell the back and make sure there's no trace of a rubber smell. At least that's what I'd do. Our solution: once we got rid of the PB rug, we found a pile wool rug on Craigslist. It was all wool and knotted so no synthetic backing material!
UPDATES [July 15, 2010]:
1. Thanks for all the signatures and posts about your own experiences. I wanted to add that it appears not just to be Pottery Barn rugs… I’ve been in friends’ houses where I could smell that telltale odor and it was not a Pottery Barn rug, though it was a wool rug with a canvas backing.
2. In my non-parenting blog life I am a journalist, and my experience with this post has piqued my interest in the issue of indoor air quality. If any of you have a rug that you’re planning to get rid of, I would be happy to take it off your hands for possible air quality testing – hopefully it is a smaller size or else you’re located in the SF Bay Area where I could do a pick up. If you’re interested in reaching me about this you can email me, Rae, at potterybarnrugpetition [at] yahoo [dot] com. Thank you!
Thursday, January 31, 2008
How to tell if something is genetically modified...
 An orange is an orange is an orange, right? Well, maybe not if it's genetically modified (GM). My sister-in-law shared this info about how to easily tell if produce is GM next time you're in the supermarket. All you have to do is look at the little sticker on its side:
- A four-digit number means it's conventionally grown.
- A five-digit number beginning with 9 means it's organic.
- A five-digit number beginning with 8 means it's GM.
Tuesday, December 18, 2007
Buttermilk Oatmeal Pancakes - toddler friendly!
These were a big hit with the girls. They're adapted from a recipe in the original Laurel's Kitchen cookbook - one that I grew up with.
Buttermilk Oatmeal Pancakes
1-1/4 cups buttermilk
1 cup quick oats
1 tablespoon canola oil
2 eggs, beaten
2 teaspoons vanilla
1/2 cup flour (can use whole wheat)
1 heaping tablespoon brown sugar
1 teaspoon baking powder
1 teaspoon cinnamon
1/4 teaspoon salt
Combine the buttermilk and oats in a bowl and let stand at least 5 minutes.
Add the oil and beaten eggs and vanilla, mixing well. Stir in the flour, sugar, baking powder and salt. mix just until the dry ingredients are moistened.
Bake on a hot, buttered griddle, using 1/4 - 1/3 cup of batter for each pancake. Turn them when the top is bubbly and the edges are slightly dry.
YUM! We broke them into pieces for the girls but I'm looking forward to the day when we can make the pancakes a little smaller and then just hand the girls a whole one.
Monday, December 17, 2007
Four Ears

We had our first brush with an ear infection this weekend. It was unfolding over the past week, but I was oblivious and didn't realize what was going on until our one daughter running a low fever suddenly spiked a 104.5 temp. We had to go to the emergency room and everything.
The thing was she was so calm and playful and didn't show any typical symptoms of an ear ache. I just gave her Tylenol like the nurse at our doctor's office said and didn't think too much of her 100-101 fever. Probably a mild bug. At the hospital, though, they said she actually had one perforated ear drum that had already begun to heal on its own, but the other ear was still infected.
I feel like there was one take-away lesson for other twin parents here. Apparently it should have been a bit of a clue that our other daughter had NO symptoms or fever at all. If it was a bug the girls probably would have shared it, like they do their saliva all over their toys. Next time one has a low fever for 2 days and the other is perfectly healthy, we're going in to see the doc stat!
Tuesday, November 13, 2007
Bottom's up...
 I'm trying to get my girls to drink out of cups and someone had the great suggestion to teach them using our shot glasses. Shot glasses are better proportioned for their small mouths, plus there's less liquid to spill when they decide to turn the cups over to see what happens. It was great advice and is helping a lot.
Mixing breastmilk and shot glasses reminds me of a story I read in this really useful book
 - So That's What They're For!: The Definitive Breastfeeding Guide. The book relates how a lactation consultant was working with a breastfeeding mama. One of the woman's problems was that her pumped breastmilk just wouldn't freeze. It took the lactation consultant a while to get to the bottom of it, but I'll give you a hint - what's the other liquid that doesn't freeze in your freezer? You got it, vodka. I think of that story everytime I go out and have a drink these days.
Monday, November 12, 2007
The Plastics Question
 Rubber Ducky,
you're the one...
with pthalates!
I was stopped yesterday while food shopping by two Cal Anthropology students. They were interviewing moms of young kids about their knowledge of pthalates and Bisphenol-A. I actually felt like I was back in school on one of those days that I coincidentally had done all the reading and the teacher decided to give a pop quiz. My good friend who works in maternal-child public health had just been talking to me about the plastics question earlier in the week.
My friend suggested I read this article in the Nation. It's about pthalates in toys... the component that seemingly makes plastics (like rubber duckies) soft. Pthalates are actually banned in Europe. Bisphenol-A (BPA) meanwhile is a concern in harder plastics like bottles. Clear bottles like Avent and Dr. Brown's have them, while murky ones like Medela and Born Free don't.
I've basically decided that plastics are convenient at times and I'm not going to banish them from my house, or invest in pricey products like Born Free. Instead, my ground rule is when it comes to kitchen wear I won't freeze or heat foods in plastics, but I do serve the girls out of plastics. And for toys, I'll happily accept hand me down hard plastic toys, but won't buy new ones.
Here's a recommendation on the baby bottle issue in particular from a Chicago Tribune article:
Until more is known about the real dangers of BPA, choose glass or supposedly safer-plastic baby bottles offered by Born Free (made with polyamide) or Medela (polypropylene) so bisphenol A can't leach into the milk. For sippy cups and water bottles, plastics labeled No. 1, No. 2 or No. 5 in the recycling triangle are considered safer. Try to keep your child from putting plastic toys -- especially those designed for older children -- in his mouth.
And always use glass, rather than plastic, to microwave food and liquid.
Tuesday, November 6, 2007
Mmmmmm... birthday cake

This is an egg-less, milk-less frosted Banana Cake that was a hit when I made it for a good friend's 1-year old. Because it doesn't have the egg whites and straight milk it should be fine for any solid foods baby who has started eating yogurt and wheat already. And who is allowed an occasional sugar treat. It made one 8" X 10" sheet cake and then one small loaf cake (sweets for later!).
I frosted the sheet cake with a version of cream cheese frosting and used the juice from some microwaved frozen blueberries to color the lettering.
Banana Cake with Cream Cheese Frosting
5 big, ripe bananas (about 2 cups)
2 cups plain yogurt
2 scant cups sugar
1/2 cup canola oil
1 tablespoon vanilla
1 teaspoon baking soda
1 teaspoon baking powder
1/2 teaspoon salt
4 cups flour (white whole wheat flour works fine here)
Preheat oven to 350 degrees. Spray an 8"X10" pan and a small loaf pan with non-stick spray.
In a big bowl smash up the bananas. Add the yogurt through vanilla (all the wet ingredients). Once that is all combined add the baking soda, baking powder and salt. Make sure it is well combined with wet ingredients, then add the flour.

Final step is to add 1 cup of frozen blueberries if you'd like them. Pour batter into the pans...
 and bake for about 35 minutes, until golden brown on top and a fork inserted in the cake comes out almost clean of crumbs. (this picture makes them look more golden than they should be)
 Then, make the frosting:
Cream Cheese Frosting
To cover one 8X10 sheet cake well, plus extra for writing
1 8-oz. brick cream cheese, at room temperature
2 tablespoons butter
1-1/2 cups powdered sugar
1 teaspoon vanilla
1 tablespoon water
Combine the cream cheese, butter and powdered sugar in a bowl with a hand mixer. Add vanilla and water to smooth. Use most of it to frost the cooled banana cake.
If you want to write "Happy Birthday Little One" on the cake here's a way to make fruit dye. Just take a handful of frozen blueberries or raspberries and microwave them in a little water.

The water will turn blue or red and if you mix that into a little bit of the frosting you'll have purple or pink frosting.
You then just fold a piece of wax paper into quarters

and spoon the frosting down in one sealed off corner. I take some scissors and snip off the tiniest bit of that corner and you can write with your wax paper "pen."

Yum!
Monday, November 5, 2007
Ergo-MOM-ics, Part 3
For those with postpartum joint pain (especially in the hands like I had) these were some of the things that helped me heal:
1. I can't say this enough... try not to tote around the infant car seats. Those things are heavy and were killers for my wrists and finger joints. (but I know, it all seems worth it at the time if it keeps baby sleeping)
2. No pushing the umbrella stroller with one hand! While it's so tempting to do - if you need to hold/comfort a baby or talk on the phone while you're going down the street- I had some of my worst joint pain after trying to steer our double umbrella stroller one-handed.
3. And on the subject of strollers, I now am trying to push ours with the palms of my hands and keeping my fingers out straight. I found that I was really gripping the stroller handles hard which was not helping things.
4. Another thing I discovered while trying to give my hands a break... gmail has keyboard commands. If you have gmail and you enable that functionality then you can ease up on your mouse use, which I found helped a lot.
5. Comfy shoes. It's a real pain to lace up sneakers when you're trying to get out the door with two little ones, but fortunately there are some good for your foot/back slip on athletic shoes out there.
6. Ask for help carrying when possible. I know, yet another thing to ask for help with, but twin parents get a crash course in this kind of community building exercise the first year.
Thursday, November 1, 2007
Ergo-MOM-ics, part 2
 What could this image possibly have to do with... ?! Hang with me for a sec. An issue I've heard about from lots of new moms, especially twin moms, is joint pain. When my hands and wrists started aching, I tried to just suck it up for a while. But when I couldn't squeeze a tube of toothpaste I went to my doctor. That's because a friend of mine reminded me about that oxygen mask lecture on airplanes: "Parents should put theirs on first and then you can help your kids." I decided that was pretty smart and I should probably be taking better care of myself so that I could go on lifting and toting my babies, especially since they'll only get heavier.
After my doctor's visit and follow up research, I've basically concluded what this post below - from my favorite parent's listserve - says. So I'm just going to repost the info below. And tomorrow I'm going to try to blog about some of the little changes I made that seemed to help my joint pain a lot:
Most postpartum joint pain is caused by ligament laxity due to
the hormonal effects of pregnancy. Ligaments are responsible for
joint stability, and after pregnancy, do not adequately support
and stabilize your joints as you move.
Most postpartum women will feel this mostly through the hips and
pelvis, though it's not unusual for other weight bearing joints
to be affected.
The good news is that since you're already 6 mos. post
childbirth, you should begin to feel more knit together soon. In
the mean time, treat your joints with care. Avoid movements that
aggrevate your joints, don't try to stretch a joint to relieve
pain. Don't walk bearfooted, choose shoes with a conoured foot
bed. When getting in and out of bed, 'log roll' your body to one
side, then use your arms to help bring yoru body upright as your
swing your legs off the side of the bed.
When lifting your baby, squat, and brace your core muscles before
you lift. Nurse your baby in a supportive chair, with a neutral
spine, i.e., don't hunch over.
Take special care of your wrists. Avoid twisting movements, and
wear wrist braces if you experience pain or tingling at night. If
your wrist pain continues, or gets worse, get a referral to a PT
who specializes in repetitive stress injuries and/or postpartumissues. In some cases postpartum wrist pain can become chronic if
left untreated.
Helene Byrne, BeFit-Mom, author, ''Exercise After Pregnancy: How to Look and Feel Your Best''
Thursday, October 4, 2007
Ergo-MOM-ics
Meet my ergonomic nemesis:
I was just tested for rheumatoid arthritis. It came back negative as I knew it would, but somehow my health care provider wouldn't listen to my plea to talk to a physical therapist about my hand pain until I ruled that out. I don't visit the doc lightly. It was only when I couldn't squeeze out a tube of toothpaste because of the pain that I decided to go in.
I'm not the only one out there with such complaints... in fact based on discussion on our local twin parents listserve it's quite common with twin parents. And as bad as it is for moms, I know it can be worse for dads who are the primary care giver because they don't have hips to use as backup for overtaxed arms and hands.
I just found this article about ergonomic tips for new moms. The only thing I can add is that I think in my case it would have helped if I'd stopped using the infant car seats earlier than I did (which was around 6 or 7 months). Lugging those around really did a job on the joints in my hands. And as much as I was dreading life without the snap n go feature, all is well (well, except for my aches and pains).
Subscribe to:
Posts (Atom)


